This dialog appears when you format a color schema for a chart. It helps you to specify either a gradient, a texture or an image as the fill effect, and consists of the following tabs:
Default
Sets all the values in the dialog to be the default settings.
OK
Applies the changes and closes the dialog.
Cancel
Does not retain any changes and closes the dialog.
Help
Displays this help document.
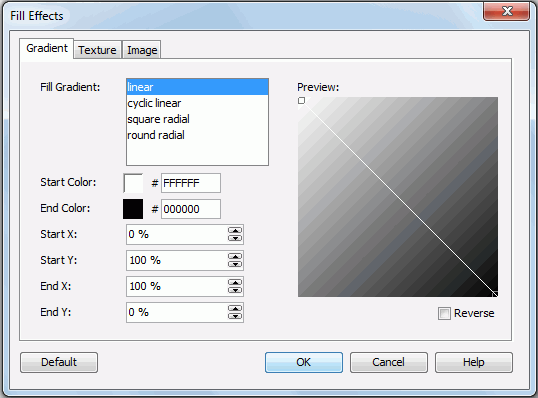
Fills the object with specified gradient colors. See the tab.
Fill Gradient
Specifies the type of gradient to fill the object. It can be one of the following: Linear, Cyclic Linear, Square Radial, and Round Radial.
Start Color
Specifies the color of the point where the gradient begins.
End Color
Specifies the color of the point where the gradient ends.
Start X
Specifies the horizontal position, measured in the percentage of the object's width, from the left edge of the object, where the gradient starts.
Start Y
Specifies the vertical position, measured in the percentage of the object's height, from the top edge of the object, where the gradient starts.
End X
Specifies the horizontal position, measured in the percentage of the object's width, from the left edge of the object, where the gradient ends.
End Y
Specifies the vertical position, measured in the percentage of the object's height, from the top edge of the object, where the gradient ends.
Preview
Displays a preview of your settings.
Reverse
Specifies whether to reverse values of Start X and End X, and reverse Start Y and End Y.
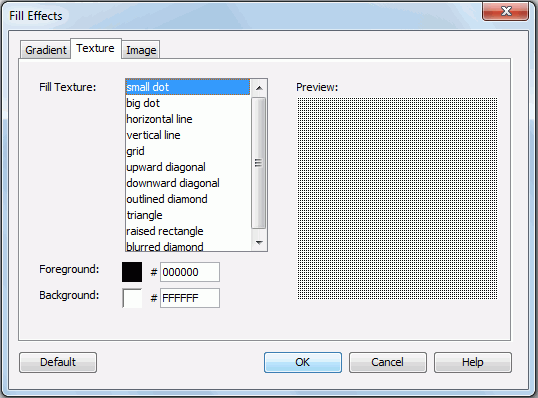
Fills the object with specified texture. See the tab.
Fill Texture
Specifies the type of texture to fill the object.
Foreground
Specifies the foreground color of the texture.
Background
Specifies the background color of the texture.
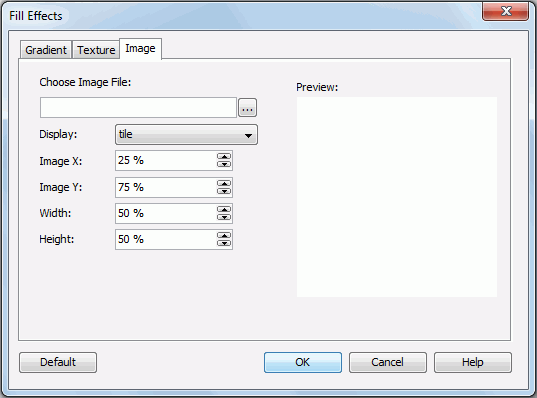
Fills the object with specified image. Available only for chart platform, chart paper and chart legend. See the tab.
Choose Image File
Specifies the image file from the current catalog folder. Type the file path directly in the text field or click the Browse button to find the directory.
Display
Specifies the layout style of the image in the object. It can be on of the following: Tile, Centered and Scaled.
Image X
Specifies the left position of the area, measured in the percentage of the image's width, from the left edge of the image.
Image Y
Specifies the bottom position of the area, measured in the percentage of the image's width, from the bottom edge of the image.
Width
Specifies the width of the area, measured in the percentage of the image's width. Setting this value to less than 100 percent will cut the image from the right edge.
Height
Specifies the height of the area, measured in the percentage of the image's height. Setting this value to less than 100 percent will cut the image from the bottom edge.
The above four options, namely Image X, Image Y, Width and Height, are used to define an area in the image and put the defined area of the image into the object.
Preview
Displays a preview of your settings.