
Track 10: Member-level Security
Member-level security enables report designers to limit user access to the specific members of dimensions in business/report cubes or of groups in business views.
This lesson requires the assistance of the server administrator to perform Task 3.
This track supposes that you have created the business view WorldWideSalesBV in Track 4 > Lesson 1.
Task 1: Create two users on JReport Server
This section has to be accomplished by the server administrator.
- Start JReport Server and log onto the JReport Administration page.
- On the system toolbar, click Security > User.
- Create two users User1 and User2.
Click Create a New User. In the displayed page, input User1 in the User Name text box, abc in the Password and Confirm Password text boxes. Then click OK.
Follow the same way to create User2 and set password to xyz.
Task 2: Set member-level security on business view groups
- Click Start > All Programs > JReport 13 Update 1 > Designer to start JReport Designer. The JReport Designer window and the Welcome to JReport Designer dialog appear.
- In the Welcome to JReport Designer dialog, click the Catalog link in the Open category.
- Browse to select the JinfonetGourmetJava.cat catalog file in
<install_root>\Demo\Reports\JinfonetGourmetJava, then click the Open button.
- On the menu bar, click View > Catalog Browser to display the Catalog Browser.
- On the Data tab, browse to Data Source 1 > Security > Business View Security, right-click and select Edit Business View Security.
- In the Edit Business View Security dialog, create two users. In the User/Group/Role section, click
 and select Add User. In the Add User dialog, input User1 in the User text box and click OK. Follow the same way to create User2.
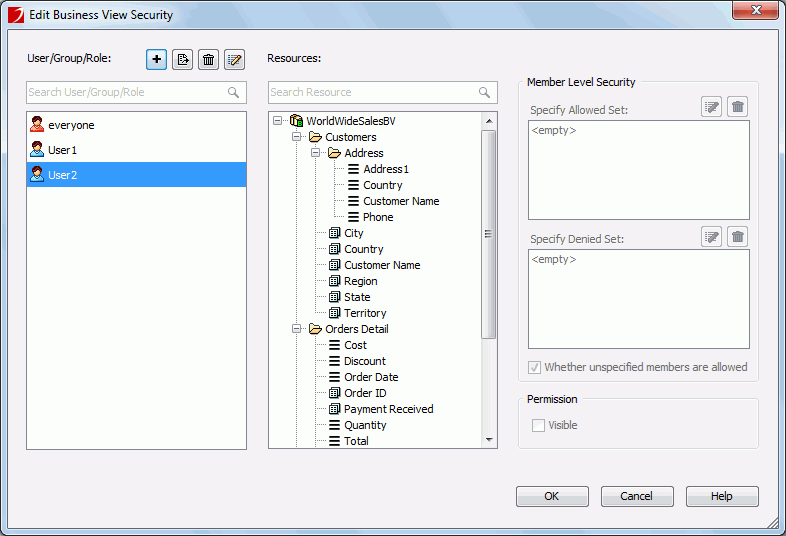
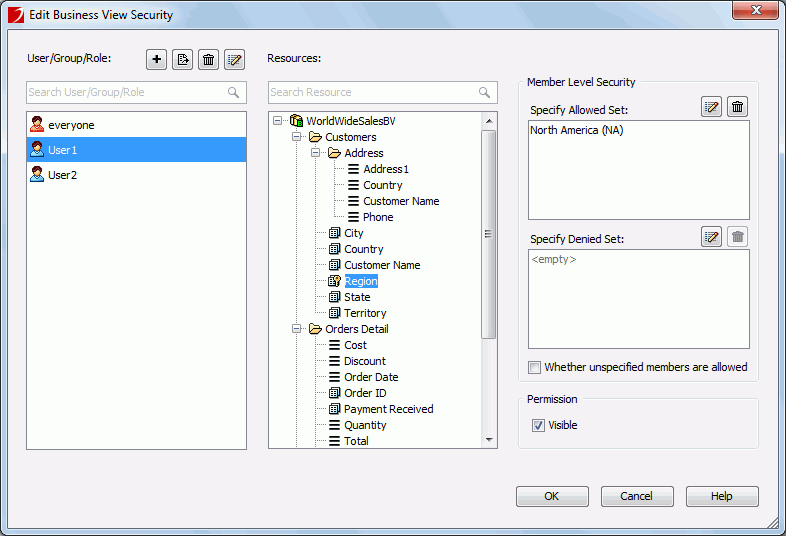
- Assign field members availability to the two users. Make Use1 selected.
- Go to the Resources panel and select Region.
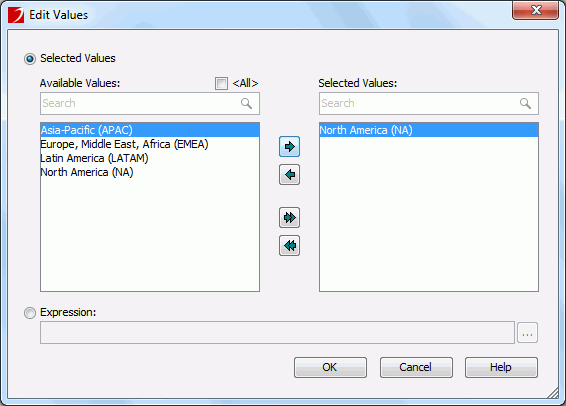
- Go to the Member Level Security section to customize which regions will be accessible to User1. To make User1 to view only the data of North America, click
 in the Specify Allowed Set section.
- In the Edit Values dialog, from the Available Values box, select North America (NA) and click
 . Then click OK.
- Uncheck the option Whether unspecified members are allowed.
- Select the Visible permission.
- Customize field members availability to User2. Select User2 and the field Region. To enable User2 to view regions other than North America, click
 in the Specify Denied Set section.
- In the Edit Values dialog, from the Available Values box, select North America (NA) and click
 . Then click OK.
- Select the Visible permission.
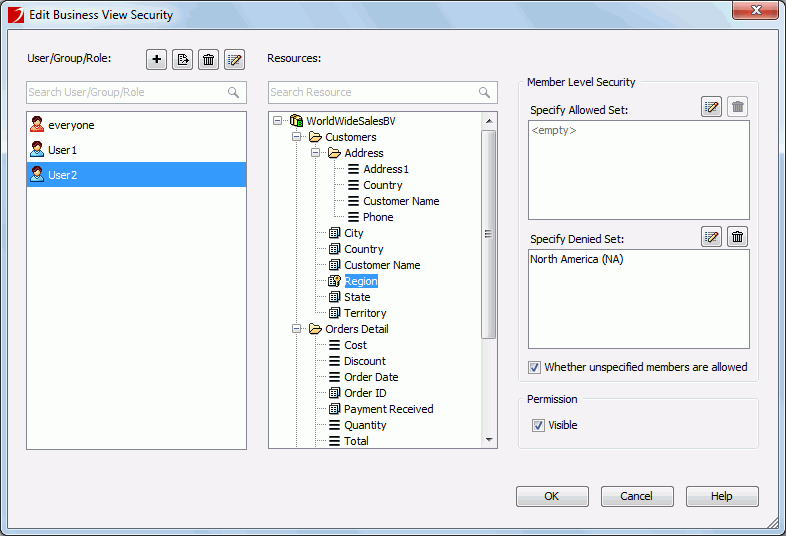
- Click OK in the Edit Business View Security dialog.
Task 3: Create a crosstab and publish it to JReport Server
- In the JReport Designer, on the File menu click New > Web Report. A blank web report will be created.
- From the Toolbox panel on the left, drag Crosstab into the web report.
- The Create Crosstab wizard is displayed. In the Data page, select WorldWideSalesBV under Data Source 1. Then click Next.
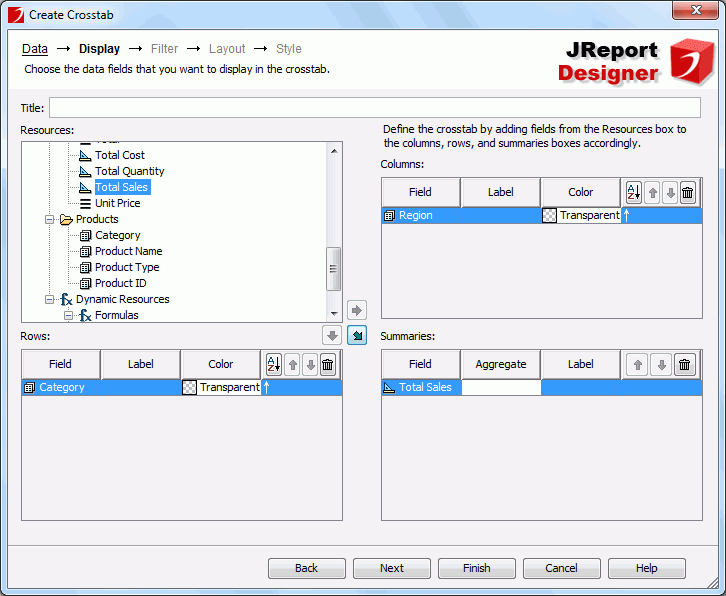
- In the Display page, select Region as the column field, Category as the Row field, and Total Sales as the summary field.
Then click Finish.
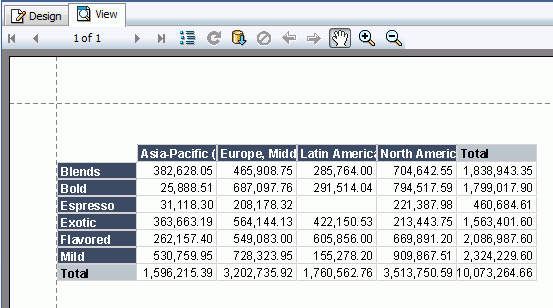
- Preview the crosstab. Click the View tab and the crosstab shows full data.
- Click
 to save the crosstab as mlscrstab.wls.
- Publish the crosstab to JReport Server. Make sure your server is started. Then in JReport Designer, click File > Publish and Download > Publish to Server > Publish Report to Server.
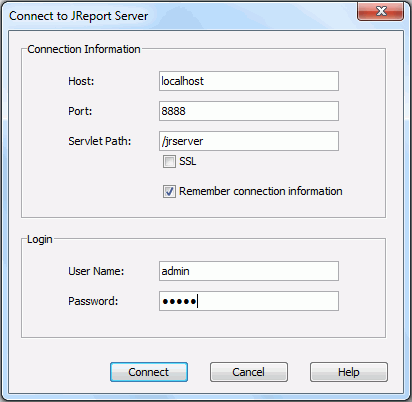
- In the Connect to JReport Server dialog, specify the required connection information. Then click Connect.
- In the Publish to JReport Server dialog, unselect the All check box and then select the catalog and mlscrstab.wls.
- In the Publish Resource To section, click Browse. Then in the Select Folder dialog, select Public Reports and click OK.
- In the Publish to JReport Server dialog click OK.
- In the Publish Font and Style and Geographic Information dialog, click Cancel.
- Click No in the message dialog.
Task 4: Assign resource permission to the users
By default, the newly created users are not allowed to run reports on the server though they are able to see them in the server resource tree. We need to grant Execute permission to the two users on the mlscrstab.wls.
This section has to be accomplished by the server administrator.
- Start JReport Server and log onto the JReport Administration page.
- On the system toolbar, click Resources > Resources.
- In the resources table, click Public Reports.
- Locate the row where mlscrstab.wls is and click the Properties button
 in the Control column.
- In the properties page, click the Set Permissions link.
- In the permissions page, select Enable Setting Permissions check box. Then click the Add button.
- In the User Permissions table, select User1 and User2 and select the check boxes in the Execute column for them.
Then click OK.

- Click OK in the permissions page and then in the properties page.
Task 5: View the crosstab
We will log onto the server as User1 and User2 separately to view the crosstab.
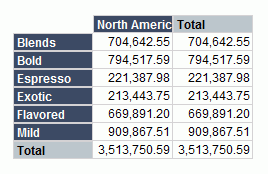
- Log onto the JReport Console page as User1 with the password abc.
- On the Resources page, click Public Reports and then mlscrstab.wls. The result will be:
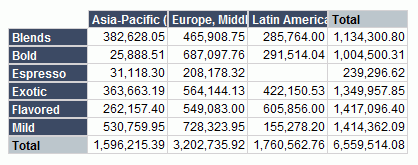
- Log out and then log in again as User2 with the password xyz. Run mlscrstab.wls and the result will be:
Track 10 summary
In this track, first on JReport Server we created two users. Next in JReport Designer we assigned the two users the accessibility to the members of a group element in a business view, created a crosstab with the group as the column header to demonstrate the member level security better, and published the crosstab to the JReport Server. Then on JReport Server we granted user permissions to run the crosstab on the server. At last we logged onto the server as the two users to view the crosstab separately.


 and select Add User. In the Add User dialog, input User1 in the User text box and click OK. Follow the same way to create User2.

 in the Specify Allowed Set section.
 . Then click OK.


 in the Specify Denied Set section.
 . Then click OK.


 to save the crosstab as mlscrstab.wls.
 in the Control column.

