

JDashboard is a new way of information delivery, using a user portal user interface rather than a web report or page report. Users can create, edit and browse dashboards from the JReport Console using JDashboard. With pre-built library components, users can freely choose the objects they want to display in the dashboard, without having to know how these objects were created, what data sources to use, what styles to set, etc. A dashboard can hold multiple library components so that when browsing the dashboard users are able to see multiple data aspects. Within a dashboard, library components are able to communicate with each other via the message mechanism. This allows actions such as common filters to be applied to all the components of a dashboard even when coming from different data sources.
In this track, we will use the two library components created in Track 5 to build a dashboard on JReport Server.
This track supposes that you have published the library components to /COMPONENT_LIB/USERFOLDERPATH/admin/JinfonetGournetJava in Track 6.
Note: A JDashboard license for JReport Server is required in order to perform this track. If you do not have the licenses, please contact your Jinfonet Software account manager to obtain it first.
 on the side bar to display the Resources panel, then go to Component Library > My Components > JinfonetGournetJava.
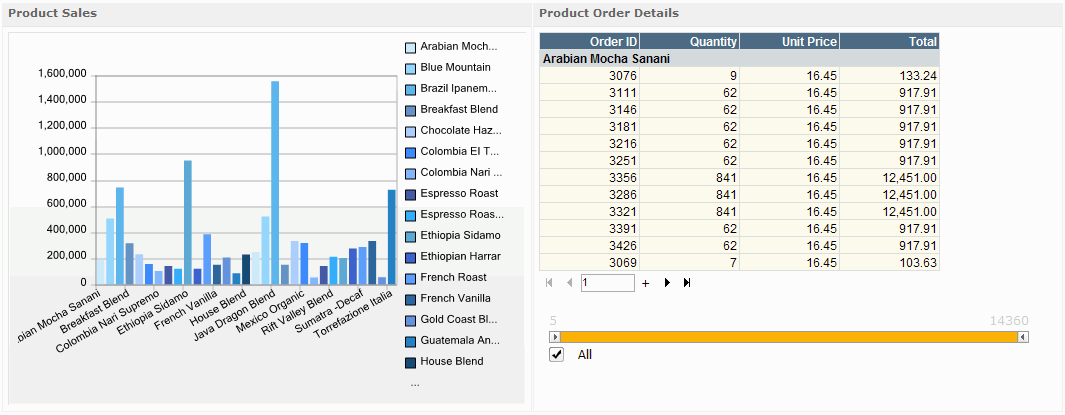
Then let's add some comments on who has made changes to the dashboard and when.
on the side bar to display the Resources panel if it is not displayed. From the Toolbox node, drag HTML to the dashboard body below the table. 
Next, we will add a title for the dashboard in its header.
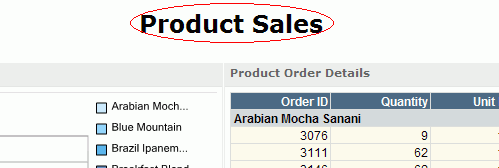
on the side bar to display the Resources panel if it is not displayed. From the Toolbox node, drag Dashboard Title to the dashboard header. Double-click in the dashboard title, then remove the sample text and type in Product Sales.
 on the side bar to save the dashboard. In the Save As dialog, specify to save the dashboard in the My Reports folder and provide a name for the dashboard file. Then click OK.
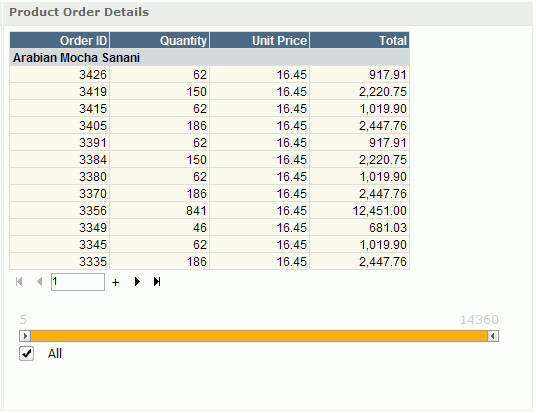
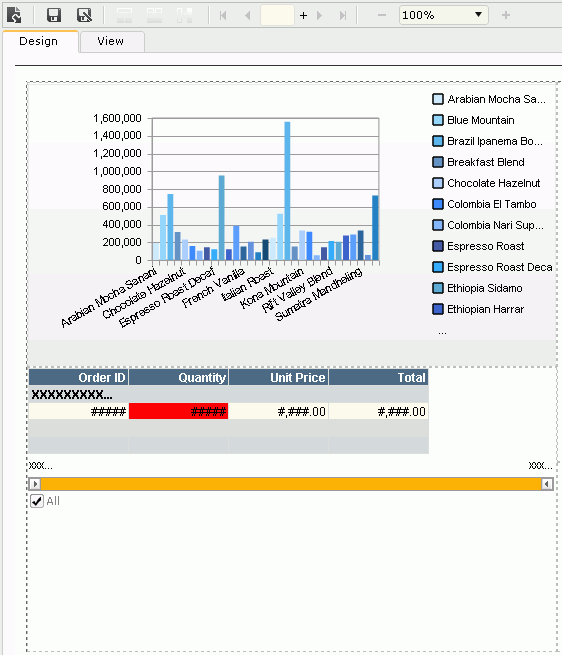
 After inserting the two library components into the dashboard, we can deliver the message between them. The message between the chart and table is defined as follows: when the click action is triggered on the chart bars, the built-in message 0002 - Sort will be sent out from the chart to the table, and when the table receives the message, it will make the order IDs sorted descendingly as a response to the message.
So to deliver the message, click any bar in the chart to send the message out, then we can see the order ID in the table is displayed in a descending order.
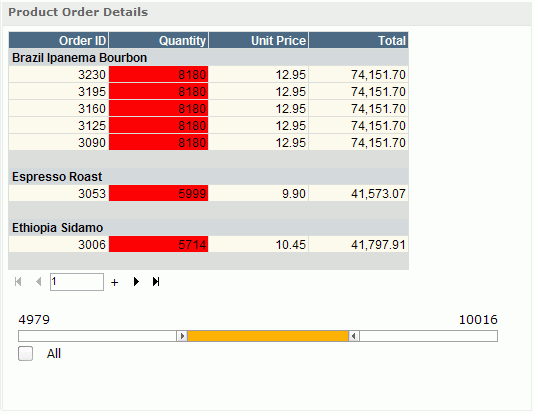
The slider in the table is used to filter on a range of product quantity. Here we would like to know which products' order quantity are within 5,000 and 10,000. To do this, first unselect the All checkbox in the slider, then drag the left cursor to a number near 5,000 and the right cursor to a number near 10,000. The result comes out as follows:
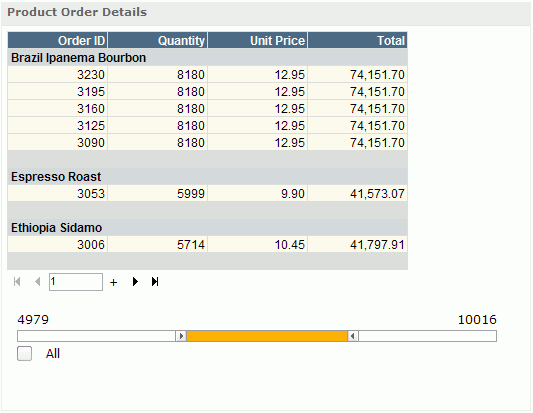
We can also see the slider filters the data in the chart too, because the table and the chart use the same data source.
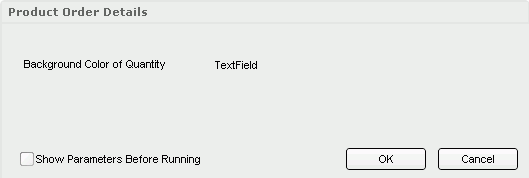
To change the background color of the Quantity field, we need to use the text field web control in the configuration panel.
 on the component title bar of the table, then select Edit Setting from the drop-down list to display the configuration panel, and we can see the text field in it.
 on the side bar to access the Export dialog. The Design tab displays the two library components horizontally which is too wide for a normal page, so we will adjust them vertically.
There is a blank cell below the table which is the position of the HTML component added in Task 1. HTML components do not support exporting so the HTML component is not available here.
We will remove the table on the right of the chart and add it below the chart.
 button on the toolbar, then drag the chart - Product Sales - from the Resources box to the top cell and the table - Product Order Details - to the bottom cell.
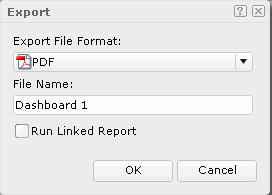
on the toolbar, then in the Save As dialog, type in a name for the layout, for example, Layout1, then click OK. You will see that Layout1 is added in the Layout drop-down list and selected as the value. in the Export dialog to do final setting and then start exporting. In the displayed dialog,
choose a format and provide a file name for the
exported result, then click OK. The exporting process will begin.
 on the side bar and you will see Set as Server Home is enabled on the menu list. Click the option to set JDashboard as the server home page.
In this track, we first created a dashboard by inserting two library components, an HTML component, and a dashboard title, and then perform operations in the dashboard such as delivering the message defined between the two library components, filtering the data using a slider, changing a property via the configuration panel, and exporting the library components. At the end we set JDashboard as the server home page so as for easier access.